
Digital Sculpture
Week1// YEAR2


TASKS
Digital Sculpture 05.10.23 –
SOFTWARE: Zbrush
Digital version of making with clay.
Human Anatomy – Character. Here we go! Rig-able bust.
WEEK 6 FIRST ASSESSMENT– Ear nose mouth and eye sculpts
WEEK 12 – Head and shoulder bust of original character.
Multiple tools – but it will remember. Tries to keep data. Clear cache.
SOFTWARE
Zbrush -
Today was an introduction to a new software called Zbrush - which is an expansive software akin to modelling with clay.
Our task today was to play around with the system and get to know some of the settings and brushes.
The task was to create a skull - which I was taking off but I seem to have failed to capture my progress.


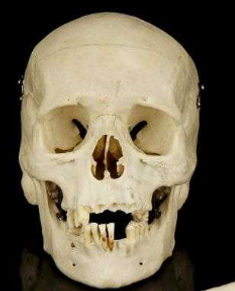


I did create more than this but cannot seem to locate the images on my One Drive.
I enjoyed using the following brushes:
* Clay Build Up
* Trim Dynamic
* Standard Brush
* Dam Standard
* Smooth.
I would like to have continued with this project but we seem unable to download Zbrush at home.
Waiting on Tutor for this.

Digital Sculpture
Week2// YEAR2


TASKS
Digital Sculpture 12.10.23 –
SOFTWARE: Zbrush
FACIAL FOCUS -
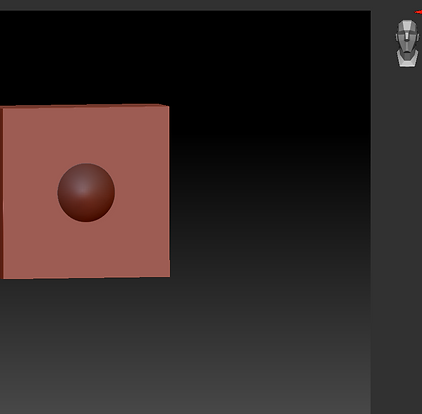
This week we began by recapping what we know of Zbrush- by opening it and bringing a primitive shape onto the canvas.
We made this into a 3D PolyMesh and began sculpting.
Z BRUSH
Helpful tips -
Shift F to show wireframe.
Make PolyMesh 3D
We used the X key to turn on symmetry and began by elongating the chin, rounding the skull and creating a neck using the 'Move' brush.
We used the shift key to smooth.

PROGRESS
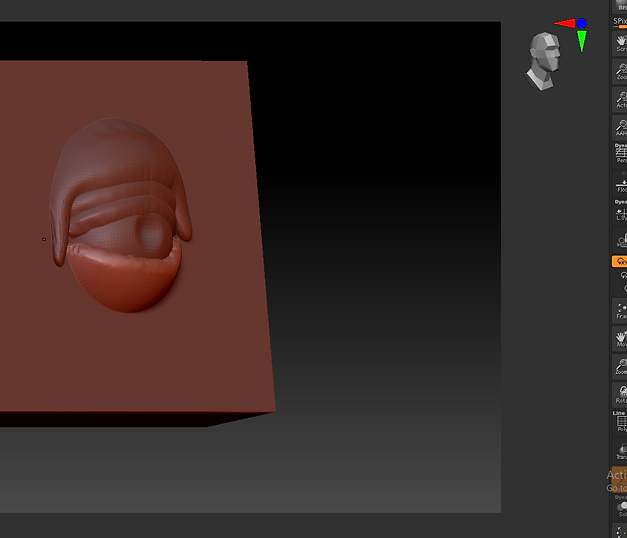
We used the move brush to create some indentations in the eyes and began to build the nose shape. This was not as easy as it sounds and as well as noticing stretching - I needed to pull in some reference materials - given that my face was absolutely terrifying.
In order to rectify the stretching we used Dynamesh - this was to rework the topology and create more resolution. We selected this tool from the 'Geometry' tab and used control and dragged up (away from our sculpture) to retopologise the item.


We used the clay build up tool, the move tool, the smooth tool to define parts of the face such as the jaw, brow and neck.
In order to create the ears - we saved our tools (Save as on the tool bar to the right) - and saved our project (FILE>SAVE AS) - Next we selected a cylinder shape from the tools area - we pressed 'E' and used the anchor points to Y axis down and used the X axis to slim the shape down to an oval.
We went back to the head sculpt in the tools panel, and found our 'ear' in the subtools > Append - We clicked on this to bring it into the canvas - we used the 'W'to move and rotate this until it was in position - went to GEOMETRY>MODIFY TOPOLOGY>MIRROR AND WELD - Once this was in place we went to SUBTOOLS>MERGE AND MERGE DOWN - We now have two polygroups in one model.
In order to move one item but not the other - we can use the Move Topology brush (M>B>T) and re-dynameshed. We can make them one polygroup by pressing CTRL and W and clicking.
The rest of the lesson was spent having fun and amended and refining the process in order to create some semblance of a human being.


Digital Sculpture
Week3// YEAR2


TASKS
Anatomy - We will be looking at the anatomical make-up of the key facial features.
Pattern recognition – How we emote.
Uncanny valley of symmetry. Avoid.
Massive asymmetry. Avoid.
We studied the skeleton, discussed how the jaw was not connected by bone.
We looked at the muscles in the face, discussed fat and skin too.
Nose –
Bone into cartilage into flesh.
PROGRESS - PART 1//NOSE
We started the process by bringing in a sphere -
We used SUBTOOLS>APPEND and brought in a CUBE.
We appended another small sphere and used GEOMETRY>MODIFY TOPOLOGY>MIRROR AND WELD, which brought another sphere to the other side.
We then moved the cube and stretched it using the W. We rotated it back towards the sphere so that the bridge of the nose protruded.


We then 'merged down' (SUBTOOL) - so that I was working on the one group. I then used the DYNAMESH (GEOMETRY>DYNAMESH) to disperse any distortion and update the mesh.
In order to make the nostrils - I used the standard brush and ALT to make indents on the underside of the nose.
We used the MOVE tool to shape them - we then merged down and used the DYNAMESH again.


I then used the TRIMDYNAMIC brush and ALT to smooth the sides and blend the edges.
We then finalised the nose with making things a little more asymmetrical and added pores to the skin.
We did this using the STANDARD BRUSH with SPRAY selected - I had to move the PLACEMENT up - and played with the flow, draw size, focal shift.


I enjoyed this process - but wasn't overly keen on my end product. I feel I rushed it at the end leading to the extra 'smoothing' at the bridge of the nose - but I feel like I learnt a lot.
Learning features is probably one of those things that will need to be done over and over because everyone is so different. I could have gone a million different ways with each ear, nose, eye and set of lips, so I hope to be able to play around and gain more experience now I have worked out the process somewhat.

PROGRESS - PART 2//LIPS
We started this element of the lesson by creating a cube - and moving out the front part so as to not beginning building from a flat surface.
In order to rectify the stretching we used Dynamesh - this was to rework the topology and create more resolution. We selected this tool from the 'Geometry' tab and used control and dragged up (away from our sculpture) to retopologise the item.


I struggled with the lips - and realised afterwards that I was probably doing my own thing here. A lot of the YouTube tutorials were doing things a lot differently, I noticed afterwards, but using the DIM STANDARD to make a reservoir at the start of the process for the top and bottom lips - and using the symmetry tool, whereas I was trying to just fashion something from CLAY BUILD UP. I don't feel that the final image is too bad, I added the tubercles - and used the SMOOTH, DIM STANDARD, PINCH - but this is something to work on.

Digital Sculpture
Week4// YEAR2
PROGRESS - PART 1//EYES.
We started the process by bringing in a sphere -
We used SUBTOOLS>APPEND and brought in a CUBE.
I then amended the size of the cube via GEOMETRY to 5, and scaled the shape so that the front of the sphere is protruding.
I then duplicated the sphere - and used the KNIFE LASSO tool to slice the top 'eyeball' - leaving the image below.

I then inflated the top eyelid using DEFORMATION>INFLATION >100.
I then DYNAMESHED it and SMOOTHED out the edge.

I followed the above process to bring in a bottom eyelid. I then selected the MOVE brush and used ALT to push in a pupil.


I then duplicated the upper eyelid - and used the INFLATE tool and moved it up - I then did the same and used the MOVE brush to sculpt it into place as the brow bone. I repeated this process with the lower lid and created the undereye.

Finally - I used CLAY BUILD UP to the surrounding cube in order to level out the eyelids with the rest of the face, I experimented with the FLATTEN brush and Trim Dynamic, and I appended a sphere for the eye. I think it needs eyelashes.

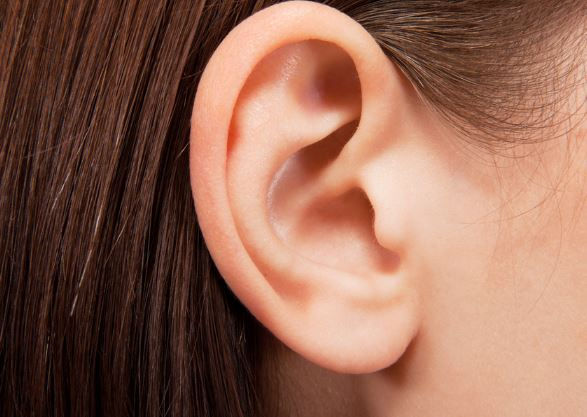
PROGRESS - PART 2//EARS.
I enjoyed the process of making the ears. I reflected back on the first time we did it and reinforced how to //APPEND.
I used symmetry - as I hadn't really experimented with that.
I used the standard brushes like CLAY BUILD UP// STANDARD//DIM STANDARD to chisel, and smoothed as I went // I feel like my final outcome is close to the reference material I was using.


Digital Sculpture
Week5// YEAR2
HAIR SCULPTING METHODS
Looking at sculpting hair- two varying methods to achieve realistic looking hair and stylised.
Hair can be one of the trickiest parts of the human sculpting process to get right.
There are a few ways we can add hair to our model.

OPTION 1 // FIBREMESH is a specialized mesh generation tool.
Unlike the fibre material, FiberMesh is not a RENDER process// Instead FiberMesh creates real geometry on the fly - which can be added to the existing model as a new SUBTOOL ...
You will find the FIBERMESH Controls in the TOOL>FIBERMESH sub palette.


OPTION 2 -
Sculpt hair using default brushes. By changing the curve modifiers in the stroke settings we can achieve stylized hair when sculpting into place.
NOTE - ASSESSMENT 2 should use the sculpting method as my character will be stylized not hyper-realistic.
FIBERMESH -
Opening the fibers button - we can see the range of options. Most common use:
LENGTH, Defines the overall length of the fibres.
The individual length of each fibre is then modulated by the mask intensity and and the BY AREA slider settings.
Coverage; Increases or decreases the density width of the fibers.
MAX FIBERS - Defines the maximum number of fibres generated. Zbrush will populate your model based on the other settings below. Values are in thousands of fibres.
COLOUR: You can choose root and end colours separately and use the curve graph you can choose when they blend along the length.

HAIR FIBER -
Mask off areas of the head - and preview the fiber mesh> using the fiber mesh palette, you can change the hair colour//thickness//length, etc
It's best to work in areas - Not all at once, think about hair that flows in the same direction.
In the example Sally used the groom brushes, 'I used the 'groom short hair' and 'groom brush' to style the back section of the hair. It can take time to get the hair to go where you want it to - so be patient. Sally's example showed the sides of the hair groomed using the symmetry tool and then the fringe with a bit of volume added at the front.

HAIR SCULPT -
Start by selecting any character head (that has no hair) from LIGHTBOX//Bring the tool into your work area > It should be PM3D already but if not then polymesh it. Append a sphere and begin to shape it to the beginnings of the hair.

Think about what hairstyle you will create, where the hairline should sit. where the parting will do, etc. Use the MOVE tool and smooth when needed. We want to start laying out the major shapes, any bulky areas should be thought about at this early stage.

Sally went in and used the move tool to create a sweeping fringe because she wanted some volume in that area. Any extra volume detail here, I am going to be 'laying hair strands over this base so will need to think about areas that might be thicker or styled to look as such.

I will be using the Curve Tube Snap brush.
This tool uses curves to create tubes and snaps them to the nearest object. That's how I will be create the hair strands. In order to apply some variation thru out the length of the strand I need to amend the CURVE MODIFIERS - To do this I need to go into the 'STROKE button' >> Top shelf > Curve modifiers > Make sure the size button is ORANGE - then alter the graph to look similar to the below.

Scroll up to the CURVE and make sure that the LOCK start is clicked. This allows us to lock the root to the scalp. If this was not turned on - the hair strand would be flying around whilst we tried to edit it.
Draw a line from the root to the flow you want the hair to follow.
I can edit this later - and be able to gently move the strand around. You can also extend the strand when you see it a red line from the mouse to the strand. Any extra strokes will attach themselves.
The strands follow the brush size so remember to vary it up depending on the area you are working on > larger pieces near the crown and back > smaller near the front > small flyaway pieces/ face framing.

PART 2//RENDER
When your hair is complete it’s time to render your sculpt - We do this in the render pallet (above the tool pallet) To show floor shadows, make sure the Floor button is also on. You can adjust render settings in the Render palette. When you have a render you want to keep, you can save it as an image file by pressing the Document >> Export button
PROGRESS //APPLY

We attempted both techniques in class - the first being the Fibermesh.
I was not a huge fan of this technique - tho I don't think it looks too bad -
I thought the process was easy enough to follow with the idea being that the hair is painted onto a 'cap' and then 'combed' -
I could also see why it would be beneficial to paint the 'cap' on in places and build the hair in separate directions.
I also made the mistake of painting the 'cap' down the back of this models neck, not realising initially that it would 'sprout' from that area directly. In future I might consider appending a cube scaled into a rectangle to the back of the models head in order to garnish a bit of distance between the models head and neck, then painting the 'cap' onto the rectangle.

The second technique was the more 'stylized' anime Hair Sculpt. I enjoyed this a lot more. - I just enjoy the style more. I look forward to experimenting with this in the future - and applying techniques like 'smoothing' to the 'Tubes'.

I started the process by using a sphere and modelling this into the foundation of the hair style I wanted to try to achieve.
I enjoyed the process of 'snappinig' or locking the hair (tubes) into place and styling them - I also enjoyed using the 'CURVE MODIFIERS' in otrder to gain more texture and different outcomes.


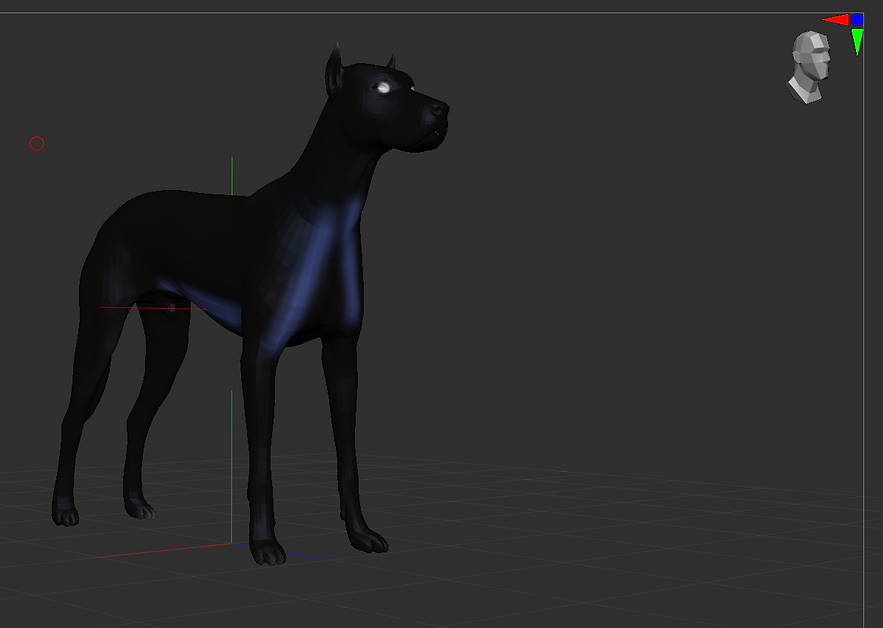
PAINTING IN ZBRUSH.
We finished this session with a quick tutorial on painting in Zbrush - we learnt that if you don't want to export into game engine, you can paint in Zbrush without unwrapping the UV maps. We did a quick example, with the dog model below.
Digital Sculpture
Week6// YEAR2
HAND IN// ASSESSMENT.
4 shots and 1 x FBX file of: EAR.


//NOSE


//EYE


//LIPS


CONSOLIDATION//
I have enjoyed this module and these assignments, they speak to me and I like sculpting and creating - but I think I have cheated myself in terms of time invested. There were initial problems with obtaining the software, but once I got it for home use, I feel like I improved.
I am not happy with the submissions for the assessment, I feel I could have done a lot better had I applied myself more and spent more time on them, but that's okay, we all have to start somewhere.
I can learn more in my spare time and improve from here on in. It's not so much about the mark, and more about whether I think I got a firm footing in the software - which I feel I have.
Additional Work //Assessment 2 // moodboard for GAME environment
_edited.jpg)
Digital Sculpture
Week7// YEAR2
WEEK 7 //
TURNAROUND/FURTHER MOODBOARD FOR CHARACTER DEV//

.png)
The character that I wish to develop is an idea I initially came up with in Year 1 for Visual Studies.
'The Author' - I'd love to continue developing this character so that I can see it go from conception, to 2D to 3D. That for me would be satisfying.
My idea was for a sinister character based in a dystopian future who kidnaps people and performs operations on them, so I imagined that he would have had a backstory that included either a tragic accident or a failed experiment, which to my mind, he has since been trying to perfect on others.... that led me to the idea that I wanted him to have a shade of green for his skin (potentially), I imagined that he would live underground - in the shadows.
Given this character is evil, it makes it a bit easier - I can consider things like the shape of his face, what makes a person look scary or angry, deformities that might be unusual or abnormalities that might provoke people to feel uncomfortable.
I like the idea of incorporating some of the visuals associated with Two Face' character from Batman, perhaps the character will have hair on one side of his head, but is scarred or bald on the other.
I will spend a little more time on the development of my character before I commence sculpting.
The four emotions I would like to convey will be :
* Amused (A smirk, one side of the mouth raised, narrowing of the eyes).
* Anger (Lowered brow into a V, narrower eyes, flared nostrils), lips pressed together (wrinkles appear).
* Disgust/Contempt (The bottom lip raises and sticks out slightly, the eyebrows lower, the nose wrinkles, the upper lip raises and forms an upside-down "u" shape).
* Surprise - (*Eyebrows are high and curved, wrinkles are formed across the forehead, wide open mouth which is formed by the dropped jaw).
Digital Sculpture
Week9// YEAR2
Week9//Blend shapes, layers and timelines.
MORE techniques -
SUBDIVISION vs DYNAMESH
We discussed how subdivison is for surface detailing, and adding pores, scars, and very fine detail at it's highest level.
Dynamesh - (+SculptrisPro) is for creating new shapes (that extend beyond silhouette. If we want to add horns, arms, and legs to a base body - we will need to use Dynamesh to correct and add the appropriate resolution to our mesh.
We start with our base shapes > Dynamesh > When you are happy with all the shapes then I can start to use the SubDivisions to add layers of complexity to your sculpt.
This can be found in:
TOOLS>GEOMETRY -
See the 1 SDIV - that means we are working on Level 1 of our subdivision - We use the slider to move thru the levels.
We can delete lower subdivision levels if we dislike what we have done. We can also reconstruct SubDiv if we accidentally delete it (tho this is not perfect, so I need to try to avoid this).
SOME RULES -
* Subdivison hotkey is CTRL + D.
* It divides equally between any edges - this means your poly count goes up by 4 so at higher levels ~ be aware of this.
* You can not Dynamesh after Subdivision so be finished and done with it before you SubDivide